
29-07-2022 09:00:56 - Updated: 29 July, 2022
Continuing with this series of articles about the flowering of marijuana plants week by week, today it is time to see the stage that includes weeks 3 and 4 of this phase, which is also very important because during this time they usually stop stretch your structure and focus on creating new flowers at full speed. Just as the first 2 weeks of the flowering stage are considered a transition period between the vegetative and flowering phase, weeks 3 and 4 could be seen as the transition between pre-flowering and the actual fattening phase of the buds.
–Vegetative growth phase of cannabis, everything you need to know
–Week 1 and 2 of the flowering of marijuana plants
–Weeks 5 and 6 of cannabis flowering
–Weeks 7 and 8 of marijuana flowering
However, the times and speed of flowering depend on the genetics of each variety. During weeks 3 and 4 of the cannabis flowering stage, indica strains will begin to fatten up their buds, as will faster hybrids. In that same time the pure sativa strains will continue to grow without even starting to show pre-flowers, and the vast majority of polyhybrids will gradually stop growing in height and begin to flower massively.
⚠️ Third and fourth week of flowering of marijuana indoors
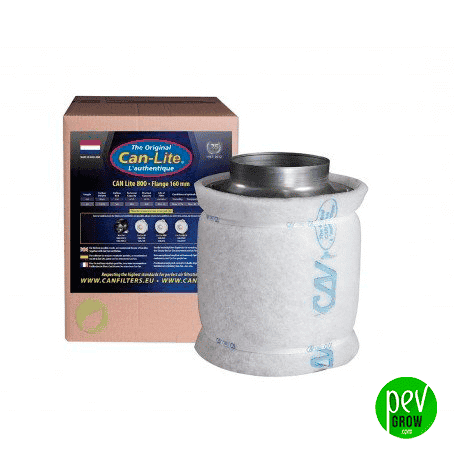
Indoors all the changes can be seen much earlier than outdoors, and the same genetics grown in both environments will normally produce flowers faster indoors than outdoors or in an outdoor greenhouse. Between weeks 3 and 4 of the flowering phase, marijuana plants grown indoors will begin to smell more and more, and this is something that you have to keep in mind so that it does not pose a problem. I don’t know if you know that carbon filters have a useful life of between 1 and 2 years, which can be between 3 and 6 crops, depending on the brand and its quality. Check its condition and consider replacing it or installing an ozone generator to help clean the exhaust air.
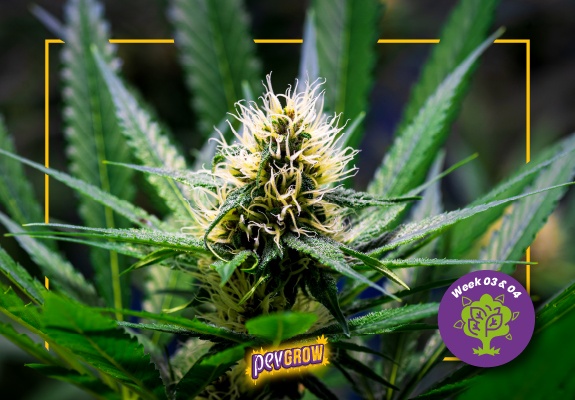
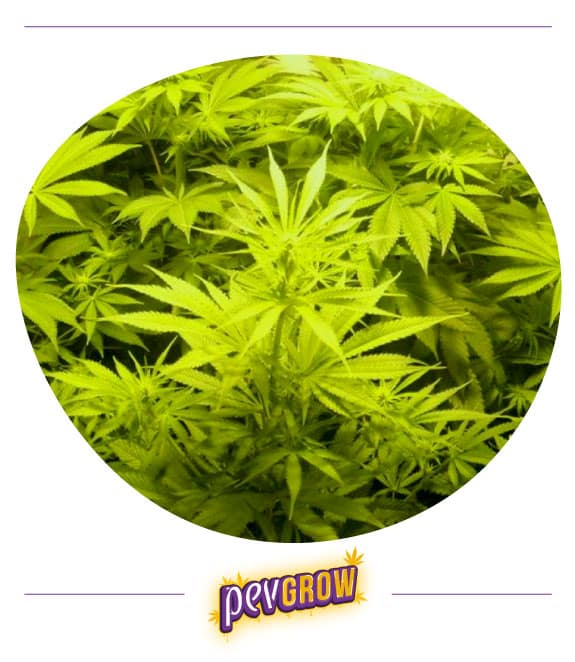
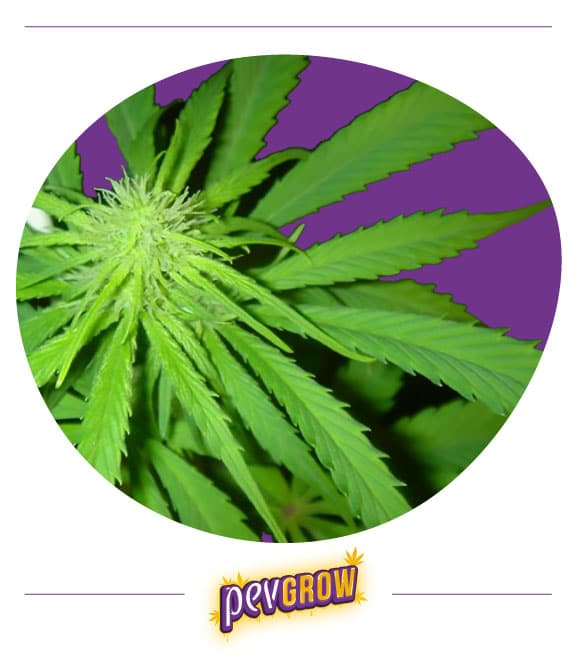
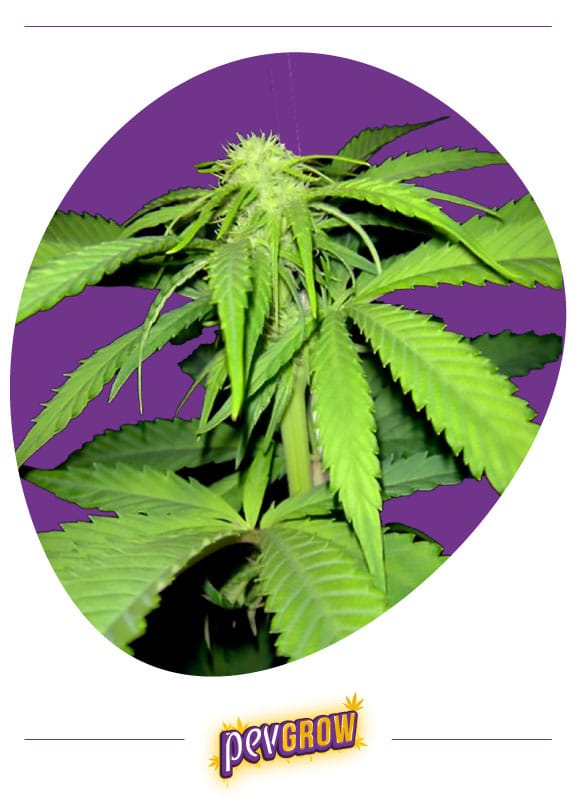
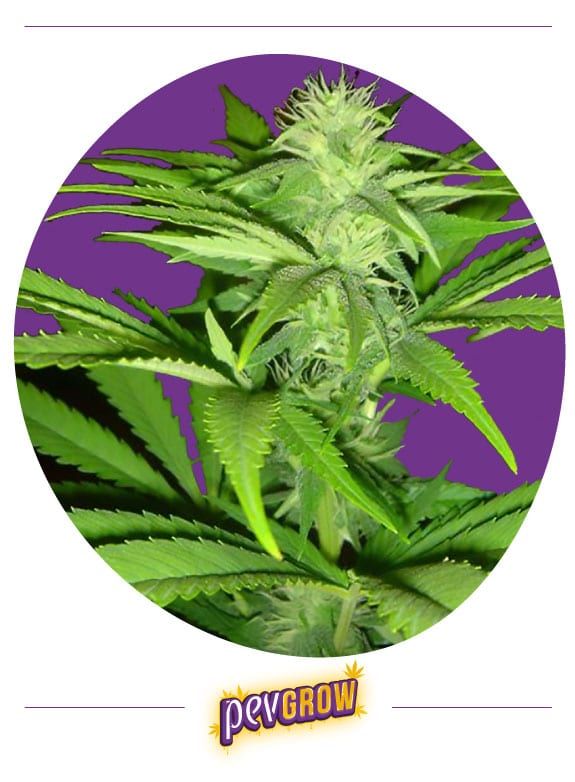
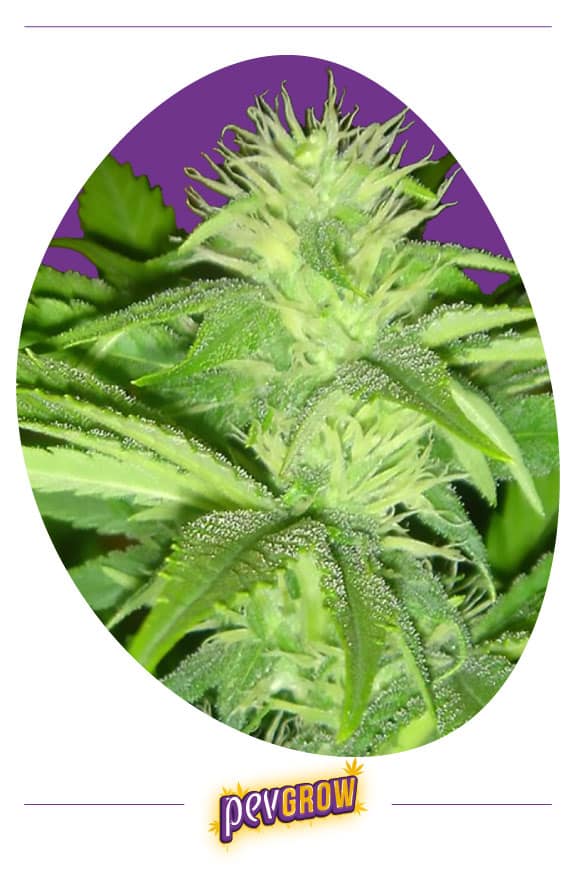
Many indoor plants begin to flower en masse, and where the first pre-flowers appeared, now you can see how there are more and more pistils that form a kind of bows, still very white. That kind of bows will have more and more hairs, and the calyxes from which they come out will be more and more visible, it is the sign that everything is going well, and little by little they will become the first real buds.
🎯 Beginning of real flowering in outdoor crops
In indoor cultivation we take into account the beginning of the flowering stage from the change of photoperiod, but what about outdoors? As we saw in the previous articles about growing cannabis week by week, outdoors all the changes are more gradual, and as a general rule the beginning of the flowering phase begins when the first pre-flowers begin to appear.
As everything goes slower than indoors, the changes are not appreciated as quickly, so in these weeks 3 and 4 of flowering, the plants will surely continue to stretch and will not have as many pre-flowers as the same genetics grown indoors would have. Also for this reason, we can continue to prune these plants at the bottom, reinforce the branches with stakes, and above all spray them with phytosanitary treatments, since in a short time we will no longer be able to apply them.
We are in the middle of summer and the plants need more and more water, first because they are bigger, but also because the temperature increases and transpiration is greater. We continue to apply preventive phytosanitary products, but now we add a new product, Bacillus Thuringiensis, to try to avoid the disastrous appearance of the caterpillar, since it is in summer when the moth lays its eggs on the plants, and the most normal thing is to see these destructive caterpillars appear of the buds, something that we must avoid by all means.
✅ Liquid fertilizer for the flowering of marijuana in weeks 3 and 4
As always, we strongly recommend following the indications of the cultivation tables of the fertilizer brands regarding the use and dosage of their products. In theory and as we have seen before, during weeks 3 and 4 of the cannabis flowering phase, the plants stop growing and begin to flower massively, so they no longer need as much nitrogen, but they begin to consume more potassium and above all phosphorus, which at this stage is surely the most important nutrient and will be very present in the flowering base fertilizer.
The assimilation of nutrients is also greater, between weeks 4 and 7 most commercial varieties reach their EC peak, but the ideal is to observe the state of health of the plants to determine if we continue with the recommended dose, increase it, or On the contrary, we lower it. The PH must also be raised little by little, more than anything because the nutrients that it needs to a greater extent at this stage are better assimilated with a PH of 6.5 in soil. The products needed in the third and fourth week of flowering depend on the brand of fertilizer used, but the most normal thing is to combine the flowering stimulator with the base fertilizer, and start applying the fattening buds as well.
🚀 Fertilizers for flowering in outdoor cultivation
With plants grown in small or medium pots (up to 50 liters) we can water in a similar way as indoors, that is, fertilizing with the liquid nutrients that are available at all times. But when we plant in large pots or directly in mother earth, we can create solid fertilizer mulches so that the plant takes only what it needs at any given time. This type of fertilizer comes in a solid format and is usually of animal origin, such as earthworm humus, bat or seabird guano, manure, etc. and they are applied leaving a layer on the surface of the earth, as a mulch, so that through the leaching caused by irrigation, the nutrients are dragged to the root zone of the plants.
This type of fertilizer is ideal for 100% organic crops, but keep in mind that they take time to take effect, so they have to be applied before the plants may need them. For the fattening phase of the buds, powdered or granulated bat guano works very well, since it usually contains a lot of phosphorus and calcium, but in order to take advantage of it, you have to leave the mulch between 2 weeks and 1 month before the plants may need it, so now may be a good time.

✨ Weeks 3 and 4 of cannabis flowering indoors step by step
If you have not seen our previous articles related to the vegetative growth of cannabis, and the pre-flowering phase or the first 2 weeks of flowering, I recommend that you do so, but if you are following the days as we have marked in those articles, you will know that we stayed on day 14 of flowering, so this sequence starts on day 15 and will end on day 30 of the flowering phase.
Surely you will think that I am annoying for repeating certain things, and surely I am, but at this moment I am going to take the opportunity to remind you of 2 things, that the cultivation tables of the fertilizer brands are created for guidance, and that not all plants they eat, grow, or flower in the same way, so you have to try to adapt the application of fertilizers and their doses to the state of health of the plants and their rate of flowering.
- Day 15: Indicas and fast-blooming hybrids will stop stretching over these days, but sativas and long-blooming hybrids will continue to grow and are just beginning pre-bloom now. In any case, the water and nutritional needs increase, but we continue to apply and adapt the recommended doses in the cultivation table.
- Day 16: In those shoots where the first pre-flowers appeared, more and more pistils are seen, although the buds have not yet begun to form. In the tallest plants you can see the difference in development between the main tips and the lower parts, since the greater the availability of light, the faster and greater the development will be. You have to observe the plants daily, looking at the leaves on the upper and lower sides to rule out possible problems.
- Day 17: The smell of the plants goes “in crescendo” despite the fact that the most normal thing is that they still do not have resin except for the cuttings of very fast varieties. Check that the air filtration system is working properly, otherwise it may be a good time to change the carbon filter before the power of the aroma increases. Everything else remains the same.
- Day 18: Now that the plants eat more, deficiencies and other nutritional problems are also more pronounced, so special emphasis must be placed on checking the leaves of the lower parts to check if they lack macronutrients, and the main shoots to rule out problems with stationary elements. The plants that grow the most can show nitrogen deficiencies in these weeks, but the balance between calcium and magnesium is also key to maintain it well.
- Day 19: Most commercial polyhybrids will have stopped growing or will stop growing shortly, at which point you can clearly see how far the light from the spotlight penetrates. If you haven’t done low pruning yet, this time can be ideal, and also take the opportunity to place stakes if necessary. For the rest we continue the same, following the cultivation table and observing the plants daily to check for possible pests, fungi, or nutritional problems.
- Day 20: If you are following this crop diary from the vegetative growth phase, on the 20th day of flowering it is time for preventive phytosanitary products, and for the fastest Indica varieties and hybrids it will be the last time, because from the moment buds begin to form, it is advisable not to spray anything on the plants. As we are alternating the products, remember that if the last day you gave insecticide, today it will be fungicide and vice versa.
- Day 21: As the flowering phase progresses, it is important to try to lower the relative humidity of the grow room, to always keep it below 50%. This can sometimes be complicated, because the plants have more and more plant mass, therefore they transpire more and raise the relative humidity. You may need to install a dehumidifier, and it would not hurt to install some other fan that removes the interior air, to avoid possible pockets of humidity that can spoil the buds.
- Day 22: We finish the third week of flowering and start with the fourth, the indica strains and the fastest hybrids begin the key stage of flowering, the fattening of the buds. The later sativas and hybrids are still growing and in pre-flowering, and at this point I’m going to give you a piece of advice that you don’t often see and it’s very important. Many fertilizer brands recommend starting with bud fattening products starting this week, because most strains today are when they need it most, but as we have seen, not all genetics flower at the same speed, and the bud fattening phase can start earlier or later. Bud fattening fertilizers are based on phosphorus and potassium (PK) and among the most famous you have PK 13-14, Monster Bloom or Bloombastic, but each brand has its commercial name. It is advisable to start with these products when the plants demand them, so if you are growing varieties that continue to grow and have not yet focused on fattening the buds, the ideal is to repeat one more week the feeding relative to week 3 of flowering of the cultivation table.
- Day 23: The resin does not appear in all the varieties at the same time either, just like the flowers, in indica and hybrid varieties it begins to appear earlier than in sativas as a general rule. Trichomes are very sensitive and fragile glands, so it is recommended to keep them intact to preserve the essential oils they contain as much as possible, since cannabinoids, terpenes, etc. are found there. This resin comes out in some leaves in addition to the buds, which can be used after harvest to make extractions or prepare cannabis recipes.
- Day 24: There are more and more pistils everywhere, in many cases the nodes come together thanks to them, and some plants can look like hairy monsters, but it’s a good sign, because it means that good buds will come out. In principle, we follow the indications of the cultivation table related to week 4 of flowering, but observing the state of health of the plants to decide whether to continue with the recommended dose or adjust it.
- Day 25: You will see that the oldest pistils were initially a very intense white color, but it seems that over time they are withering and acquiring a darker tone that is usually reddish or brown. This is normal, and it can serve as another indicator to see the state of maturation of the buds, because now you will see that there are some withering pistils but most of them are white, well, there will come a time close to the harvest when the most will be withered and there will be very few whites.
- Day 26: The daily changes in the plants are very visible now, we are approaching the completion of the fourth week and now they need a lot of water and nutrients to accompany the great development they have. When you make a monoculture of cuttings from the same mother plant, all plants eat the same as long as they receive the same light and have the same conditions, but when you grow seeds, even if they are of the same variety and have come from the same package, it is very possible that with the same diet some specimens may present deficiencies, others are totally healthy, and some may even show signs of overfertilization, it is also normal, and in these cases the ideal is to regulate their diet individually.
- Day 27: If you are following our recommendations regarding phytosanitary treatments, on this day it would be time to apply fungicide or insecticide, but beware! Only if you are growing varieties with more than 10 weeks of flowering, because if the buds are already fattening, it is not good to spray anything. Now it is time to be more attentive if possible to the possible appearance of pests, if we have not put them before it may be a good time to place photochromic adhesive traps that warn us of the presence of insects as soon as possible. From now on, in many cases, only biological control remains as an insecticide remedy.
- Day 28: We finish the fourth week of flowering and tomorrow we start with the fifth, and I have to tell you that now the best is coming, and so that the plants can increase their yield to the maximum, we also have to give the best of ourselves. Some brands of fertilizers do not include enzymes, and many growers do not give them the importance they have, but at this stage of the crop they are crucial to avoid the accumulation of salts in the substrate, so if you are not using them we recommend that you do so. For the rest we continue the same, following the cultivation table but trying to adapt it to the times required by the variety we are growing, and above all observing the plants a lot to check their condition.
⛳ Conclusion
In this article we have seen the changes that occur in marijuana plants during the third and fourth weeks of flowering, as well as the care they require at this important stage of cultivation, since it involves the transition between pre-flowering and the bud fattening. In future posts we will review the following weeks of cannabis flowering, and how they are the most beautiful of the crop, I hope you do not miss them.
⭐ Frequent questions
What humidity is needed for marijuana to flower?
Humidity can be a problem during the flowering stage, especially from the moment the buds start to compact, as it can cause fungal problems. Ideally, try to keep the relative humidity below 50%, and you may need to install a dehumidifier for this.
How much light does a flowering marijuana plant need?
The quantity is important, the more the better, but the quality of the light is much more important, which must have a spectrum as similar as possible to that of the sun. During flowering it needs more light than in vegetative growth, especially in the fattening phase of the buds, because during its maturation the demand decreases. During the vegetative phase the light spectrum is white/bluish, similar to that of natural light in spring, but in flowering the best spectrum changes blue to red, simulating the natural spectrum of summer.


