02-08-2022 09:00:36 - Updated: 2 August, 2022
Marijuana plants go through different phases or stages throughout their lives, germination, vegetative growth, flowering and maturation. All phases are equally important, and we always give more importance to the flowering phase than to the rest, but you will never be able to get great buds if the plants do not arrive healthy and strong until the fattening phase. For this reason we have thought that it might be a great idea for you to have this article at hand, where we are going to thoroughly review the vegetative growth stage of the cannabis plant, so here we go…
–Week 1 and 2 of the flowering of marijuana plants
–Weeks 3 and 4 of cannabis flowering
–Weeks 5 and 6 of cannabis flowering
⚠️ What is the vegetative state of marijuana?

It is the state in which plants develop leaves, stems, branches, and new shoots but still do not produce flowers or buds. It is the growth phase of marijuana plants, the stage between the germination of the seeds and the flowering phase. When cuttings are grown instead of seeds, vegetative growth begins once the branches have rooted and begin to create plant matter.
🎬 Phases of marijuana growth
The vegetative growth phase of cannabis plants can be divided into 3 stages, the seed germination phase, the seedling phase, and the normal growth phase. The germination phase usually lasts between 2 and 10 days, depending on the vigor of the seeds, their age, or the method used, among other factors.
The seedling stage can last approximately 2 weeks, and in this case the genetics of the plants, the amount of light they receive, and environmental parameters such as humidity or temperature count. Once the seedlings become plants and begin to grow and generate new shoots at full speed, the normal vegetative growth phase can be considered to begin, which lasts until the photoperiod changes to 12 hours of light and 12 hours of darkness.
👾 Products for the growth of marijuana
Among all the products necessary for the correct growth of cannabis plants, the most important are fertilizers and phytosanitary products, but there are others that you have to know in order to give your girls everything they need.
- Pot : Before starting the cultivation you have to decide if you want to make transplants or on the contrary you are going to plant in the final pot. The ideal is to do at least one transplant, since in this way the food from the substrate is better used, but if you do not have much experience you can do the whole crop in the same pot.
- Substrate : The most widespread substrate is soil, but it can also be grown in coconut fibre, expanded clay, perlite, or in hydroponic or aeroponic systems. If you decide to grow in soil, I recommend that it be from a specific brand for cannabis, Canna, Biobizz, Plagron, or the one you like the most, but ideally it should be from a well-known brand in the sector.
- Phytosanitary products : Among phytosanitary products we have insecticides and fungicides, and within insecticides there are also acaricides. It is highly advisable to start using these products preventively from the vegetative growth phase of cannabis plants, because to achieve the best harvest it is crucial that the plants reach the flowering phase free of insects and fungi. A mixture of neem oil and potassium soap can be used as an insecticide, and propolis can be used as a fungicide.
🎯 Growth fertilizers for marijuana
Fertilizers deserve a special section, because there are many formats, from many brands, that are applied at different times, and you have to know how to use them correctly. Growth fertilizers for cannabis contain NPK (nitrogen, phosphorus and potassium) and microelements, especially nitrogen, which is the nutrient that is consumed in the greatest quantity during this stage.
Among the commercial growth fertilizers for marijuana, it is necessary to distinguish between the base fertilizer, the growth stimulator, and the additives. Some brands have a single product that contains all the minimum nutrients necessary for the proper growth of plants, but other brands offer different products that they recommend combining to achieve the best results. If it is grown with soil as a substrate, the food it contains must be taken into account to decide the moment and the amount of fertilizers that we give with the irrigation.
Another option is homemade fertilizer for marijuana growth, which you can make yourself and save a few euros, but you have to do it and apply it well so as not to cause fungal problems, overfertilization, or other nutritional problems. If you want to see several recipes to make your own homemade natural cannabis growth fertilizer, I recommend that you see this article on our blog.
🔥 Growing marijuana indoors
When we grow indoors we have to try to imitate nature to provide light, air, humidity, CO2, and water to the plants. Each of these factors play a role in overall growth, and marijuana growth time and speed will change depending on the combination of these elements.
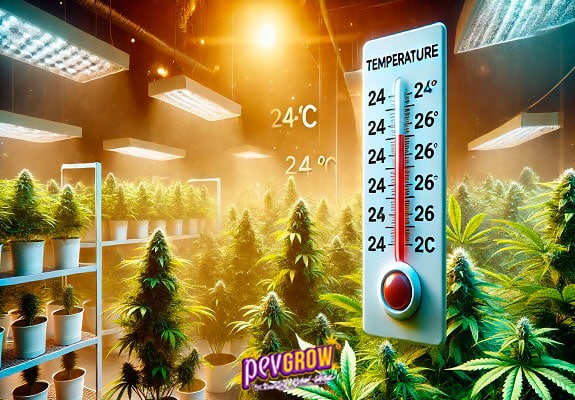
- Light: The indoor cannabis growth photoperiod is 18 hours of light and 6 hours of darkness each day. The spectrum is recommended to be white or bluish in tone, and the type of light can be full-spectrum LEDs, fluorescents, metal halides, or LECs, although new technologies are currently being tested with encouraging results. The distance of the focus with respect to the plants is determined by the temperature, and the ideal is to place a thermometer or thermo-hygrometer at the height of the highest parts of the plants, and bring the focus as close as possible as long as they do not exceed 25ºC.
- Air : Ventilation has several functions in cultivation, aerating the room, moving the plants to reinforce their stems, avoiding possible pockets of humidity, improving the internal temperature, and renewing CO2. The most advisable thing is to install a ventilation system made up of an extractor that removes the accumulated air to the outside, and another upside down to introduce clean air from outside to the crop. To calculate the extraction, you have to multiply the cubic meters of the crop by 60, and multiply the result by 1.33, and this is so because the power of the extractors is calculated in M3/h. Once we have calculated the extraction power, we must calculate the air intake, which has to be half the extraction power. In addition to these extractors, you have to put fans to remove the interior air, aimed at the plants so that it moves them a little.
- Humidity : During the vegetative growth phase, cannabis plants need a humid environment, and in many cases it is necessary to install a humidifier to increase the relative humidity. During the germination phase of the seeds, the humidity has to be as high as possible, during the first week of growth the ideal is that it oscillates between 80% and 90%, and the following 2 weeks of the vegetative stage is recommended that it is around 70%, lowering little by little so that it is around 50% before the change to flowering. As plants grow, they have more and more plant mass, and through the transpiration of the leaves, the relative humidity of the environment increases.
- CO2: During the vegetative stage it is not necessary to increase CO2 levels, and good air renewal is enough. In flowering, it is highly recommended to install a CO2 generator to maximize the performance of the plants, especially during the fattening phase.
- Water: We strongly recommend watering with soft water, either osmosis, distilled, or from the tap as long as it comes out with an EC of less than 0.5. If you water your plants with hard water, it is normal that at a given moment nutrient deficiencies or other feeding problems appear. Working with soft water allows you to add more nutrients to the irrigation, something that is later reflected in healthier plants and a higher overall production.
✅ Vegetative growth phase of cannabis in indoor cultivation step by step
Well, we already know everything that marijuana plants need to achieve healthy and strong growth, so now we are going to see step by step the development of plants in an indoor crop using soil as a substrate :
- Day 1: The first day of vegetative growth can be counted from when the plants emerge from the substrate. At first you will see 2 small round leaves appear, they are the cotyledons that keep the first food reserves. It is recommended to water with root stimulator but only around the stem, leaving the rest of the substrate dry so as not to harm the oxygenation of the root system. As long as we don’t wet the entire surface of the soil, the area around the trunk can be kept moist, but from the moment we wet the entire surface it is important to respect the dry cycle between waterings

- Day 2: On day 2 hardly any development is seen compared to day 1, the trunk will have grown in height but not in thickness, and the greatest growth will be underground, with the roots colonizing the substrate at full speed although we do not see it. We continue watering with root stimulator but wetting a little more of the surface around the trunk of the plants.

- Day 3: If you see that the plants spike (the trunk grows too high) it may be a sign that the focus is too far away, and it will be necessary to consider moving it closer, but always taking into account the temperature. Now it is a good idea to put a fan pointing at the plants so that when they move they reinforce their trunks. We continue watering the same, around the trunk but a little more than in the previous days. If you want to see the best way to irrigate cannabis, check out this article on our blog.

- Day 4: The cotyledons continue to grow, the trunk begins to thicken, and little by little they begin to take the form of plants. If the area of the substrate that we are watering is still wet, you can save today’s watering, but as I said before, as long as the perimeter of the surface of the substrate remains dry, the area around the trunk can remain wet.

- Day 5: The cotyledons are no longer growing, but now we see that a new shoot comes out of them, which are the first real leaves of the plants. These leaves are single leaflets, but you will see that they grow much faster than the cotyledons. We must continue watering with root stimulator taking into account everything we have seen in the previous days.

- Day 6: From now on the plants begin to pick up a good growth rate, the first pair of leaves develops very quickly, and the trunk continues to thicken while it continues to grow. At the moment we are still the same, same environmental parameters and same diet.

- Day 7: The first week of the crop is over, and you have to know that the most boring part has passed, so from now on the good part begins. At the same time that the first pair of leaves continues to grow, you will see that a new shoot begins to appear, which will already be leaves with 3 leaflets. We must follow the data from the cultivation tables of the brand of fertilizers we use, bearing in mind that it is better to give a little less than the recommended dose.

- Day 8: Now that the plants are beginning to take on size, it is time to start treating them with preventive phytosanitary products to avoid future problems. The most advisable thing is to alternate the products to give the insecticide and the following fungicide one week, and continue like this until the buds begin to fatten. These products are applied as a spray, always in the dark or with little light, and there are some such as neem oil that are also systemic, so they can also be applied in irrigation. In this article on our blog you can see several recipes to make homemade insecticides.

- Day 9: The plants grow faster and faster, the surface of the leaves is increasing as well as the caliber of the trunk. At the same time that they are growing they are also generating new shoots, and if you look at the center of the top of the plants you will see that a new shoot appears. With the irrigations we continue the same until we wet the entire surface of the substrate

- Day 10: In the case of sowing the seeds in pots with a capacity of 1 to 3 liters, it will be time to transplant them to a larger one. To decide when to transplant, you can look at the color of the cotyledons and the first real leaves, since this is usually the area of the plants that shows a lack of nutrients first. If you see that they lose their healthy green tone for a lighter one, it is time to transplant. To carry out the transplant without problems, I recommend you take a look at this blog post where we explain in depth the best way to transplant.

- Day 11: Now the plants have several nodes, cotyledons, leaves of one leaflet, then 3 leaflets, and now the ones with 5 leaflets are starting to come out. The leaves have more and more surface area, so they are able to absorb more light and therefore the rate of development is accelerated. The distance between nodes depends on several factors, the genetics of the plants (in the broader sativas), nutrition (especially nitrogen) and the amount of light they receive (the less light the greater the spike).

- Day 12: If you transplant, in the next 2 irrigations it is highly recommended to add root stimulator, even if it is not marked like that in the cultivation table. Many genetics begin to branch during these days, between 10 and 15 days of life of the plants, although this also depends on their genetics. The plants must be observed every day to check their state of health, especially the leaves, which is where possible nutrient deficiencies or attacks by pests and fungi are seen. In this article you have a lot of extra information regarding fungal problems in cannabis crops.

- Day 13: Now that the plants can start to branch, it is important that they have enough lateral space so that they can receive enough light in all areas, otherwise they may grow more vertically and develop less branches. We continue to observe the plants daily, following the cultivation table but taking into account that the fertilizer brands do so as a guide, so there may be varieties that need more food, or the opposite.

- Day 14: As the plants grow, the thermo-hygrometer or its probe must also be raised, since it must always be located at the height of the highest parts of the plants. As a general rule, we will begin to see the new shoot appear, which will be leaves with 7 leaflets, that is, the typical marijuana leaf. It is a good idea to spray the leaves with water from time to time, without soaking and once the light has been turned off.

- Day 15: A week has passed since we gave the first preventive treatment with phytosanitary products, so it’s time for the second. If in the first we gave the insecticide, now it will touch the fungicide, or vice versa, and in 1 week we will give an application of the same product that we gave on day 8. It is very possible that some plants are more developed than others, we will not Don’t worry, it’s totally normal and happens with all varieties, and even with other plants and animals

- Day 16: The daily changes are more and more noticeable, if all goes well now the plants develop at full speed, and the decisive phase of the vegetative growth stage of marijuana begins. We continue to raise the focus based on the temperature, taking into account that it has to be as close as possible as long as it does not exceed 25º C.

- Day 17: If you grow sativa strains, you need to start considering switching to flowering, because these plants can multiply in size during flowering. If you grow mainly sativa hybrids, you can leave them a few more days in the vegetative stage, but the vast majority of commercial genetics need more growth to end up with a good size in flowering. We continue with daily observation to correct possible problems as soon as possible. If they have started to branch, from this moment you can do apical pruning to encourage lateral growth over vertical growth. For more information regarding topping, check out this article.

- Day 18: Now it is a pleasure to visit the farm every day because the plants develop very quickly. The trunk begins to be woody, harder and less tender than it was in previous days. The plant mass is already beginning to be considerable, and for this reason the plants transpire more and can increase the relative humidity of the environment. As the plants grow, their nutritional needs also increase, but the ideal is to follow the recommendations of the cultivation table.

- Day 19: The branching of the plants is becoming more evident, and now the growth is distributed between vertical and lateral development, enlargement of the surface of the leaves, and fattening of the trunk and stems. If you did pruning, it is possible that the branches are growing a lot now, and if you did not do it, you will already see the next bud appear. Remember to respect the dry cycle between watering and watering, sometimes 3 days or even more can go by without the need for watering, but the ideal is to base yourself on the weight of the pot to decide whether to water or not.

- Day 20: The plants already occupy a large space, and as they widen, they must be separated from each other so that they can continue to receive light throughout their structure, especially if you did pruning, since this helps the growth of the branches. We continue to examine the plants, both on the surface of the leaves and on the underside, to make sure that everything is going correctly, and we continue to follow the growing table to achieve the best development.

- Day 21: 3 weeks of growth are completed and the plants are already of a considerable size, now they are more resistant, and we are entering the last phase of the vegetative stage, so we must pay special attention so that they do not lack anything to the plants. If you topped, the plants should already be almost wider than they are tall, although this depends on their genetics as well. If you didn’t, the new leaves may have 9 leaflets, but there are many varieties that produce leaves with a maximum of 7 leaflets.

- Day 22: Day of application of preventive phytosanitary products, I remind you that you have to alternate weekly the insecticide and the fungicide, so in the case of having given fungicide on day 15, today it will be the insecticide, and vice versa. It is necessary to continue observing the state of health of the plants, especially the lower leaves that mark the deficiencies of mobile nutrients, and the main shoot that is where the deficiencies of immobile nutrients appear. Click here if you want to see the main nutritional problems of marijuana.

- Day 23: As a general rule, from this day we enter the last week of the vegetative growth phase. The fastest genetics can start to produce the first pre-flowers, which in females are a kind of white hair, and in males they are like small balls, but don’t worry, if they are not autoflowering they will continue to grow as long as they have a photoperiod of 18 hours of light and 6 of darkness each day.

- Day 24: It is important to put special emphasis on observing the plants in this last part of the vegetative growth phase of cannabis, because if we are unfortunate enough to suffer from a deficiency or any other nutritional problem, it must be solved before changing the flowering photoperiod. If we are strict with phytosanitary products, it is most likely that we will not have problems with pests or fungi, but even so, we must monitor daily, especially if we visit other gardens before entering our crop.

- Day 25: Take into account the genetics of the plants to decide when to switch to flowering, knowing that sativas grow much more during flowering than indicas, but most commercial varieties today are polyhybrids, so you have to consider the ratio of indica and sativa. If you have topped and want the plants to continue to grow wider than they are tall, you can do a second pruning to the tallest tips, especially if you have in mind to apply the optimization method known as SCROG.

- Day 26: In the case of having to transplant to a larger capacity pot, the moment is now, because the ideal is that they have several days of adaptation before changing the photoperiod. Humidity no longer needs to be very high, ideally around 50% to 55% or so, and the plants themselves generate quite a bit of humidity, so the humidifier may no longer need to be activated. For the rest we continue the same, but paying more attention if possible because we are in the final stretch of the vegetative stage.

- Day 27: We continue to increase the focus as the plants grow, observing the general state of health, and if the leaves show a healthy green, we continue applying the doses recommended by the manufacturer in the cultivation tables. The plants are already quite large, so they have greater water and nutritional needs and if we have not done transplants, surely now we have to water more often.

- Day 28: It’s the fourth week of vegetative growth for marijuana plants, so I’m assuming you’ll be growing indica strains or mostly indica hybrids, otherwise they might get too big during flowering. If there are no nutritional or pest problems, we continue doing everything the same, checking the environmental parameters and the health status of the plants.

- Day 29: This day marks a week since the last application of phytosanitary products, so I guess you already know that today is the next one. I don’t need to tell you that you have to keep alternating them, so if you used the fungicide last time, today is the insecticide’s turn. For the rest we continue the same, raising the focus based on the temperature, and if the leaves show a healthy green we continue with the cultivation table.

- Day 30: You may want to give your marijuana plants more days of vegetative growth, but it is normal not to give more than 30 days, so today would be the last of this stage. Before changing the photoperiod and forcing the flowering of the plants, you have to be sure that they are fine and do not have health problems, since in this case it is better that they be solved during growth. If all goes well, the photoperiod can be changed to 12 hours of light and 12 hours of darkness each day.

🚀 Growing marijuana outdoors
Growing outdoors is much easier because nature itself is in charge of providing everything that cannabis plants need to grow without problems. Marijuana is an annual plant, which is generally born in spring and dies in autumn, although there are varieties that mature later.
When you germinate seeds outside in early spring, the sunlight spectrum is perfect for marijuana growth, the temperature is ideal, and it rains more often than other parts of the year, so plants thrive develop fully and need less assistance than planting at another time.
➕ Autoflowering Marijuana Growth
In general, autoflowering varieties develop in a very similar way to photoperiod-dependent varieties, so the environmental parameters can be exactly the same. However, the specialty of these plants must be taken into account, since they begin to flower spontaneously after 3 or 4 weeks of life, so you must try to make them as large as possible before reaching that time.
In indoor cultivation it is best to set a fixed photoperiod of 20 hours of light and 4 hours of darkness, but not only in the vegetative growth phase, but also for flowering because that way they produce more. In outdoor cultivation, the best season for cultivation is spring and summer, coinciding with the highest number of hours of sunshine and light incidence. Another important factor with these plants is the transplant, because as they have such a short vegetative cycle, we must try to ensure that they do not have any problems at this time, so it is recommended to plant the seeds in the final pot if you are not sure make the transplant without problems.
✨ Conclusion
Today we have seen the needs of cannabis during the vegetative growth phase, as well as a day-to-day monitoring of this important stage of plant life. Remember that all these data are indicative, so they must be adapted to the rate of development of the variety that we are growing, knowing that there may be faster genetics and others that are much slower. If you want more information, I recommend you take a look at other cultivation guides on this blog, and if you liked this article, I would appreciate it if you share it on your social networks so that it reaches more people
☕ Frequent questions
How long does the growth phase of a marijuana plant last?
That depends on the genetics of the plants you grow, because sativas take longer to start flowering and continue to grow a lot during flowering, and this is something to take into account. As a general rule, it could be said that on average it is between 3 and 5 weeks, but photodependent varieties will continue in vegetative growth as long as they have a photoperiod of 18 hours of light and 6 hours of darkness daily.
How long does it take for a plant to show sex?
This also depends on the genetics of each plant, because they show sex when they reach sexual maturity. Autoflowering will show pre-flowers between 18 and 28 days of life as a general rule, pure indicas between the fourth and fifth week of life, and pure sativas after 4 weeks or more if they are with a 12/12 photoperiod. This is so because of the ancestors of each strain, since the ruderalis come from a latitude with a very short summer and for this reason they begin to flower earlier, the indicas have a somewhat longer summer and begin to flower a little later, and the sativas they come from more southern, tropical and equatorial latitudes especially, where they enjoy a much longer summer, so they take longer to start flowering