
15-11-2019 10:00:07 - Updated: 15 November, 2019
Autoflowering varieties are the solution for many growers. These fast and discreet plants have earned a place in the garden of many houses, but we have found that some users grow them in the same way as normal ones.
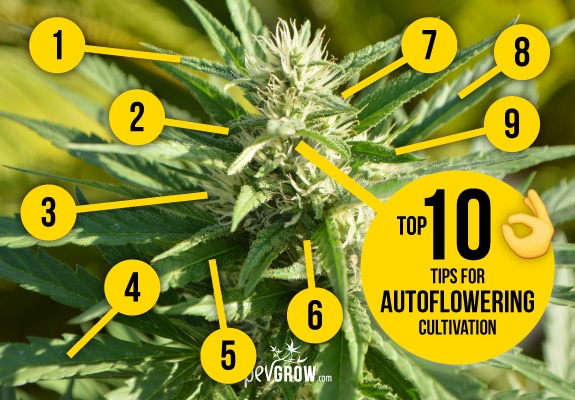
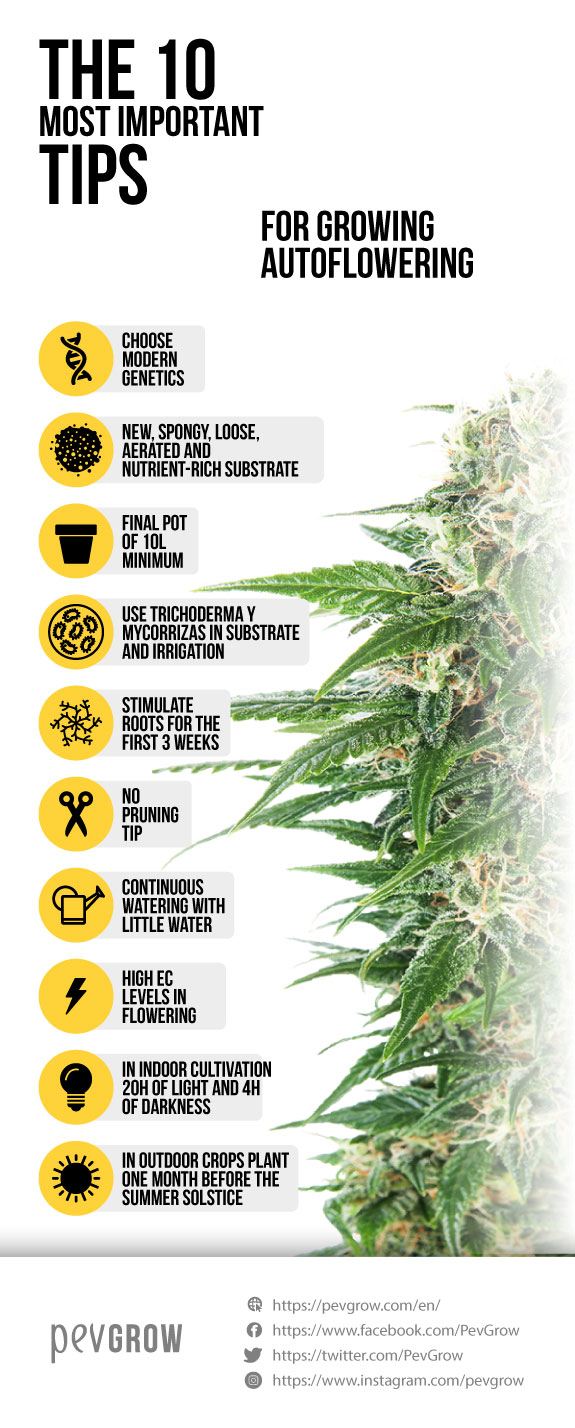
In this article we are going to review the 10 most important tips to get a great yield with automatic flowering cannabis plants. Do you want to know which ones they are? Well, here they are….✍
1. Choose modern automatic genetics.
In general automatic genetics have evolved a lot since the first Lowryder. Thanks to selection and breeding of the populations with the best individuals, these plants increasingly resemble the normal photodependent ones, so the current ones are better than those of 10 years ago.
Years ago it was difficult to achieve a large production of tasty and potent buds with autoflowering seeds. Luckily this changed and nowadays it is relatively easy to get a good autoflowering crop with a lot of resin, THC above 20%, and great aroma and flavour, as with the Haze XXL Auto.
2. Use a new, aerated and nutrient-rich substrate.
Autoflowering plants have a very fast vegetative growth cycle of just 3 weeks. Once this time has elapsed, they begin to flower spontaneously, regardless of their size or growing conditions.
The final production of an automatic flowering variety is directly related to the total size of the plant. This is why it is so important that during the first 3 weeks of life nothing slows down their development.
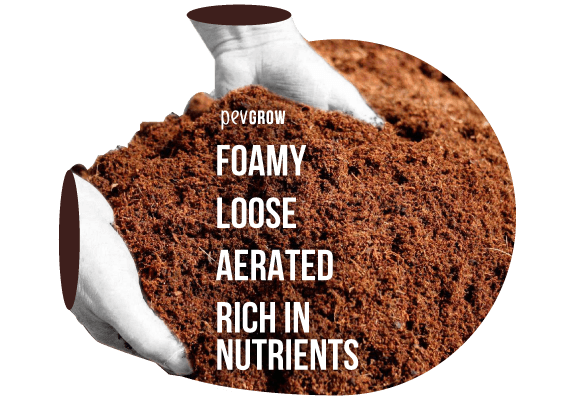
The key to achieving maximum growth and development during this time is to create a good root system, and to achieve this goal it is best to prepare a foamy, loose, aerated substrate to oxygenate well, and rich in nutrients.
3. Final pot of at least 2,64 US gallons.
At this point there is some controversy, as there are growers who prefer to plant autoflowering seeds directly in the final pot, and others who choose to do transplants. We can tell you that you can achieve great performance in both ways, as long as you do things right.
Is it better to transplant autoflowering plants?
From our point of view it is, the nutrients of the substrate are better used making transplants. But be careful with this, if the roots are damaged during the transplant or the plant is stressed, the development in general can be stopped, and so that production is reduced.
When a photodependent variety is transplanted we can wait for the root system to fill the entire pot. This ensures that there is hardly any chance of damaging the roots, since you get all the roots bread compact. But with autoflowering plants we cannot wait with a small pot for the roots to fill it, because then we would be losing development and time. When the root system has not filled the entire substrate you have to be very careful with the transplant, some deep roots with few branches can break during the process. If you choose to transplant I recommend that you germinate in a pot of 0,8 US gallons, and after 20 days make the transplant to the definitive pot.
If we prefer not to risk in the transplant and to plant directly in the final flowerpot it is necessary to consider 2 important details. The first is not to overwater during the first few weeks. We have seen seedlings, or small plants of 2 or 3 pairs of leaves, in pots of 5,28 US gallons soaked, and this is not good at all. When you are not going to transplant, remember that you can water every day a little, but keep in mind that when the plant is small it has hardly any roots to absorb, so you only have to water around the stem, and gradually water a little more surface. Once we water the whole pot it is important to respect the dry cycle, as it is the only time that the substrate is oxygenated, and not water again until it has dried a little, which is the second detail we see frequently.
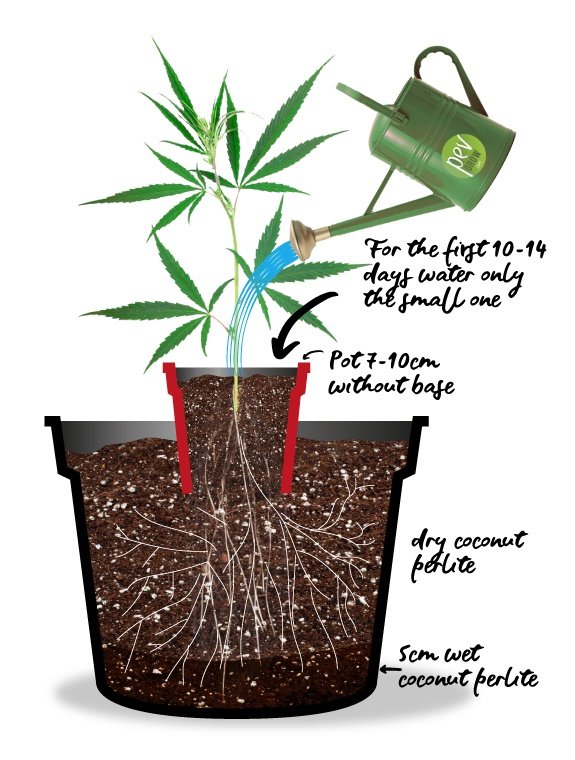
If you already have your plant in a small pot and need a solution, here’s the trick:
- Cut off the bottom of a “cup” or a 7-10cm pot.
- Place 5cm of coconut: wet perlite in the bottom of a 10 litre pot.
- Fill the wide part of the 10 litre pot with coconut perlite (dry)
- Bury the 7-10cm cup or pot halfway down in the 10 litre pot. Fill this with coconut-pearlite as well.
- Now plant your sprouted seedlings in the cup and water in the usual way.
- When watering your autoflowering plant, be sure to water ONLY in the small pot for the first 10 – 14 days. This will ensure that the seedling receives the water it needs (and depending on its age, the nutrients as well).
- Meanwhile the main root of the car will grow downwards, an accelerated growth outside the wet coconut-pearlite layer, just know that it is in the bottom of the 10 litre pot.
- The main root sends an extensive network of smaller root hairs that also seek that water source.
4. Use Trichoderma and Mycorrhizae.
It is not essential, but it is so interesting that we always recommend adding microlife to both the substrate and the irrigation. These beneficial fungi and bacteria have several functions that help improve the performance of autoflowering plants.
The first advantage of using Trichoderma and Mycorrhizae is that they act as a root system protector against fungi and other external pathogens. These microscopic beings produce a mycelium that colonizes the entire substrate to prevent malignant mushrooms from being able to access.
The other great advantage is that through this mycelium it can help bring food to where the roots do not reach. Plants eat more and that affects their overall health.
5. Add root stimulator to the irrigation during the first 3 weeks
During the first 3 weeks of life, that is right, during the fast vegetative growth phase of automatic genetics. This point has to do with the previous 3, that is to say, with the objective of reaching the maximum development both radicular and aerial.
Ideally, an organic root stimulator should be used, so that it is compatible with microlife and can work in combination. Once the plant begins to draw pre-flowers it is time to stop adding the root stimulator, and start watering with flowering stimulator.
6. Do not prune the main tip.
It is not really very interesting to do apical pruning or F.I.M., since they do not take advantage of it to optimize production. In this case the opposite can happen, because of pruning development time is lost and instead of improving the crop can be reduced.
In indoor cultivation it is interesting to prune from low to autoflowering plants, especially the so-called Auto XXL. These plants grow quite a lot, and in many cases the light from the focus does not reach the lower parts well, interfering with their normal development. If you need help when making any kind of pruning in cannabis, I recommend you read this article that talks about it.
7. Continuous watering but with little water.
There is no unanimity on this point either, but we recommend moderate risks on a daily basis. With normal photodependent varieties I would tell you that it is better to water with more water, and then wait until it has dried before watering again. With autoflowering varieties we prefer to water with less water but more often.
We have to take into account what we saw before, the size of the pot in proportion to the size of the plant is the key factor to determine how much water is needed at any given time.
As long as the whole surface of the pot is not moistened there is no problem with the oxygenation of the substrate. No matter how much we water in the central part, around the stem, there will be no problems because the earth continues to oxygenate at the edges. But when the whole pot is moistened it is better to wait until it dries a little before watering again, as it is not good for the substrate to remain soaked for a long time.
8. High levels of E.C. in flowering.
They take in higher levels of nutrients than most normal strains, but that doesn’t mean you can give them all the fertilizer you want. During growth it doesn’t need more than the root stimulator and microlife, so when flowering arrives the substrate is still quite clean of salts, that’s really good.
When the first pre-flowers begin to appear we start to give them the flowering stimulator, at that time it is also good to start with the flowering base fertilizer. During this phase the plant continues to grow, but still does not need high doses of nutrients for its potent development.
Once the plant stops growing and focuses on fattening the flowers it is time to begin to provide fattening flowering, along with the stimulator and fertilizer base of this phase. Now they admit E.C. doses of 2.0 and even more, right at the key moment of cultivation.
9. Photoperiod of more than 15 hours of light daily in indoor cultivation.
We know that automatic varieties do not rely on hours of light and darkness to grow or bloom. These plants can be maintained throughout the growing cycle with the photoperiod of growth, that is, 18 hours of light and 6 hours of darkness.
This is a great advantage, because normally the more light the more production, so being able to flower with more than 12 hours of light will increase the weight of the crop. We must also bear in mind that the greater the photoperiod or light intensity, the greater the need for irrigation and food. The same variety cultivated with 12 hours of light or 20 hours of light is going to eat very differently, so it is necessary to combine it with a greater diet when cultivated with more hours of light.
10. Choose the best outdoor season for your crop.
As it happens indoors, autoflowering varieties grow and produce more when they have more hours and intensity of light, in this case the sun. We do start from the premise that when the sun shines most during the year it is at the beginning of summer, we already know when it is the best season for the outdoor cultivation of automatic flowering strains.
The ideal is to germinate the seeds one month before the summer solstice, which is almost the maximum number of hours of light, so that the flowering coincides with the best time of the year.
If you do several outdoor autoflowering harvests each year, it’s best to start the first one in early spring. This one ends almost at the end of this season, and at that time we germinate the second round, which will be cut almost at the end of summer, and if the weather in your area is not too harsh in autumn, you are still in time to germinate a third one.
The size of the pot must be adapted to the season, this means that a summer crop will always need more volume of pot than a crop in spring or autumn. But outdoors it would be nice to put at least a 5,28 US gallons, from then on, depending also on the discretion you need.
Summary
– Pests? Home remedies can help
– Marijuana pruning, all techniques
– Irrigation water as a key factor in indoor cultivation
– Essential tips to start growing indoor cannabis
Conclusion
The most important requirement to achieve the highest production with autoflowering is to get a large root system as soon as possible. From our point of view it is better to transplant, as long as it is done without causing stress to the plant. The final flowerpot indoors should be more than 2,64 US gallons, and outdoors more than 5,28 US gallons. The photoperiod indoors more than 15 hours of light, and continuous watering with little water.
Keep these tips in mind when you are going to cultivate autoflowering plants, follow them and then tell us how it went, and if you liked this article you do us a favor if you share it.🤗👍


Very interesting.
I had a tower fan and it was turning etc and I thought everything was looking okay.
Then I noticed a mushroom big as well.
1st timer ever.
Up to their growing automatically, has got to be seed bank.
I have had a big difference between them.
00 seed bank great prices and never had a problem.
Others I have had as low as 2 seeds in 10 sprout and germinate.
Don’t buy seeds for an unproven source.
EBay a big no no.
Hi John,
We agree that Ebay is not a good place to buy seeds.
Next crop I recommend you to try Pev Seeds genetics, take a look at the strains they have:
https://pevgrow.com/en/3130-pev-bank-seeds
Regards
So utilizing the small cup to increase roots is interesting .
Do you remove the small cup or leave it . Would a peat cup work better than what appears to be plastic in your illustration?
Hello!
The small pot is left in place, not removed.
Regards