16-08-2022 08:00:32 - Updated: 16 August, 2022
Sowing marijuana seeds is easy, but you have to keep in mind that they are rather delicate little living beings, so you have to do it right so that they can go on without problems. To make sure that the whole process ofis clear to you sowing and subsequent transplanting of plants marijuana, we have created this article explaining everything in detail, so I don’t waste any more time …
⚠️ Time and best date to sow marijuana

Before choosing the best time to sow marijuana seeds, you need to know that growing indoors is not the same than growing outdoors. The best time to sow outdoors is spring, when the days start to get longer and the intensity of the sunlight starts to be powerful. It is best to wait until night temperatures do not drop below about 15 ° C, as the cold can slow down the development of the seedlings.
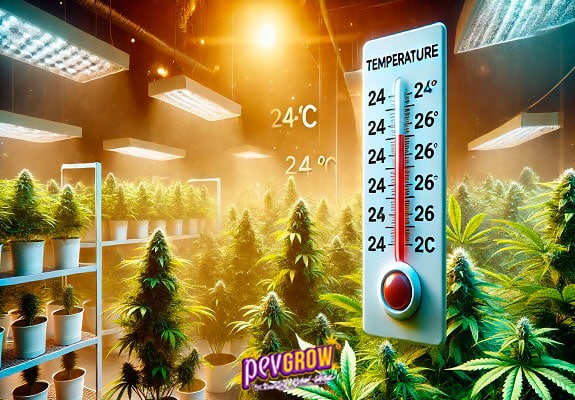
On the other hand, the best date to grow marijuana indoors is after summer in many parts of the world, because the ideal temperature for indoor cultivation is around 24ºC. This does not mean that cannabis cannot be grown indoors in the summer. , but in many places it requires air conditioning to maintain correct parameters.
👾 Where to grow marijuana?
It depends on the type of cultivation you want to do, because if it is in the ground you can sow the seeds in a jiffy or directly in a pot with soil, it is good to start with a volume between 0.25 liters and 3 liters. But if you want to do hydroponic cultivation, I recommend sowing the seeds in small mesh pots with expanded clay balls, as this facilitates the subsequent transplant. It can also be sown in a rock wool pad, or in the sponges we use to make cuttings.
If you plan on using coir when growing, you can sow the seeds in any of the above options, but perhaps the best option would be coconut jiffy so they get used to that substrate as soon as possible.
🧐 Steps for sowing marijuana
- Put the seeds to germinate, I suggest you read this article which talks about the best way to germinate marijuana seeds.
- Prepare the jiffy, the cap or the pot where we are going to sow the seeds. Remember that the jiffy, sponges or rock wool plugs must be hydrated first.
- Choose the place where they will grow, since the moment we sow the seeds they must start receiving light as soon as possible.
- Prepare the tools and products we will use (tweezers, watering can, pipette, root stimulator) and the nutrient solution to be watered immediately after sowing the seeds in their new location (water with root stimulator with pH adjusted to 6.0)
🎯 How to sow marijuana seeds step by step
Once the seeds have germinated, it’s time to sow them to begin the vegetative growth cycle. As I said at the beginning, the sowing action is not difficult but you have to be very careful not to damage the roots.
- Take the germinated seed with the help of tweezers, being careful not to touch the root that comes out.
- Carefully insert the seed into the substrate, jiffy or thorn, rooting, to a depth of about half a centimeter.
- Cover with soil if it is a pot, water slowly around the seed, trying not to get water on it.
- Place under the light if you are growing indoors, or in the sun if you are growing outdoors, to prevent the plant from standing out as soon as it begins to grow.
We now have our seeds planted in the substrate where they will start growing, but will they stay there until harvest? No, the ideal is to transplant into a larger pot when the plant grows a little, into a hydroponic or aeroponic system if you plan to grow “without soil”, or into a larger pot with new substrate, soil or fiber.

⛳ Post-sowing, from seedling to marijuana plant day by day
In this case we are going to cultivate in soil, so once we have sown the seeds and watered the substrate, we only have to wait for the seedlings to appear. The time and speed of development depend on many factors, both external and the seed itself, so it is best to maintain the correct environmental parameters to speed up the process. Since we plant the seeds in the ground, the ideal is to put the pots under the light and maintain a temperature of 24 or 25 °C and a relative humidity between 80% and 90% the first few days, but we will see it day by day. day to repair the changes.
- Day 1: Seedlings often take more than a day to emerge from the substrate, so they may not be seen yet. Do not be impatient, sometimes due to genetics or vigor they may need more time, but you have to know that there are products that can help speed up this process, which is watering with root stimulator and microbes Biobizz. Watering with warm water also helps, as it is less of a shock than cold or very hot water.
- Day 2: When the seedling sprouts it still does not have real leaves, the first thing that is usually seen are two small round shaped green leaves, they are the cotyledons and they contain the first food reserve of the seedling. It is also very possible that the first thing you see coming out of the ground is the same seed hooked to the cotyledons or the stem, because sometimes they do not open completely or they are held by the funiculus (a kind of vegetal placenta) In this case It is best to wait a few days to see if the seedling itself is capable of releasing the seed, since as the cotyledons grow they push it, but there are times when there is no other solution than helping to release it manually.
- Day 3: From the moment the cotyledons of the seedlings are seen, it is important that they have a good disposition of light so that they do not sprout. The first day the focus can be placed 1 meter away, the second at 60 or 70 cm, and from the third day we can base ourselves on the temperature to adjust the height of the light, placing a thermo-hygrometer or its probe at the height of the seedlings and bringing the focus closer to the maximum as long as they do not exceed 24 or 25 º C. At first the cotyledons are very small, but they will increase in size during the first week of life.
- Day 4: During this first week of cultivation it can be watered daily, but without soaking the substrate, we will only water the area around the stem, and gradually widen the irrigation ring until the entire surface of the substrate is completed. At the moment only the cotyledons can be seen, but the stem will gradually grow and increase in thickness, with an increasing rate of development. If you want to speed up the strengthening of the stem, it is best to put a fan that moves the seedlings a little, but carefully so that they do not bend or fall.
- Day 5: Until now, a great aerial development of the seedlings cannot be seen, since the most important changes are taking place in the underground part, with roots that are gradually colonizing the entire substrate of the pot. The roots grow looking for the moisture they need, and for this reason they develop better when the dry cycle between irrigations is respected. If we only water around the stem and the perimeter of the pot remains dry, there is no problem, but from the moment we begin to wet the entire substrate, we will have to wait until it dries before watering again. It is possible that the cotyledons no longer develop, but from now on we will see the first real leaves appear, the good part begins…
- Day 6: Above the cotyledons we will see a kind of shoot that is actually the first 2 real leaves starting to grow. At first the plants produce leaves with only one leaflet, at the next node they will have 3 leaflets, at the next 5, and so on until the flowering phase begins. If we follow the indications of the cultivation table of the brand of fertilizers that we use, it is possible that they recommend starting to apply the growth base fertilizer, otherwise we continue with the root stimulator and microlife.
- Day 7: From the moment the first pair of real leaves begins to grow, the rate of development speeds up quite a bit, especially when they have all the right parameters or are very vigorous genetics. It’s important to brace the stems so they can support the weight of the actual leaves, otherwise they can bend and won’t grow as fast. The first week of cultivation is over, and from now on real leaves of a certain size can be seen, it can be considered that they have changed phase, from seedling to plant, and depending on the size of the pot, it is possible that we will touch transplant.
🔥 When to transplant marijuana?
This depends on the capacity of the pot you planted it in, but I will tell you roughly that in a 0.25 liter pot with “All mix” type soil they can last about 1 week, in 1 liter they can stay 2 weeks, and in those of 3 liters up to about 3 weeks.
Some growers wait until they notice that the plant lacks food to transplant, although I don’t recommend it with the autoflower, as otherwise they can slow down its development and lose growth. With normal flowering plants you can wait to see the cotyledons start to fade, as they are the first food reserves they have.
In indoor crops it is recommended to transplant before changing the photoperiod in flowering, because it is a procedure that if not done correctly can cause a certain stress to the plants, with the consequent loss of yield.
✅ First marijuana transplant
The first transplant is done when the marijuana plants are still small, so must care be taken during the process, as bad movement or a fall can lead to the breaking of the trunk or some branch.
It is recommended to use the same type of substrate in every transplant, because it is a good way to avoid stress in the plants, as they are used to a certain texture and nutrients.
The first marijuana transplant must be done when it is necessary, it is not good to wait too long because the plants will start to show nutrient deficiencies and will lose part of their development.
🚀 How to transplant marijuana step by step
1-We prepare pots that have at least three times the capacity of plants before transplanting, filling up to half more or less with soil.

2-Let’s wait for the substrate to dry to where the plants are so it doesn’t cost much to root them out.
3-With one hand we take the pot where the plant we want to transplant is located,fingers leaving the trunk between the index and middle.

4-With the help of the other hand, we turn it carefully, and remove the pot holding the plant between the fingers.
5-Once the old pot is removed, we turn the plant with the substrate again and carefully place it in the new pot.

6-Now we have to finish filling the new pot with substrate root, making sure that the entire root system of the plant is well covered.
7-And finally, all that remains is to water with water and a root stimulator so that the roots colonize the new substrate as soon as possible
👌 Tips and Tricks for Sowing and Transplanting Marijuana the Right Way
- Some people sow seeds as soon as the root tip shows a little, or even earlier, as soon as the seeds are hydrated. We recommend waiting a little longer, at least until the root is a couple of centimeters . Nothing happens if the seedling comes out of the seed, with care and with the help of tweezers it can be sown without problems, but in this case instead of burying the whole seedling, the cotyledons must be left outside.
- You can moisten the substrate before sowing the seeds, in this way you will avoid the problem that the jet of water can cause if it falls on the seedling. You can also wet the substrate with the help of a sprayer, so you are sure not to damage the plant.
- At the time of transplanting you can prepare the new pot by filling the substrate halfway, then insert the pot where the plant is and fill it with soil around it so that it has the right shape you will need. In this way, when you transplant the hut it is already created and you do not have to fill anything other than the surface with soil, you can see the method in the following sequence of images:


- Adding micro-life such as mycorrhizae or trichoderma to the substrate accelerates rooting, prevents root stress, facilitates absorption of nutrients and, what’s best, protects against attack by fungi such as fusarium.
- Take advantage of the transplant to check the health of the roots, so you can avoid future problems. The roots must have a healthy white color, with many branches and have colonized most of the substrate. If they haven’t developed much or have a brownish tone, there’s a problem.
✨ Conclusion
Today we learned the importance of properly sowing and transplanting marijuana plants, a very important act that can mark the future of the crop, so you have to do it right. And you, do you have a particular technique or a trick that helps you to perform these actions in a better way? If so, let us know in the comments and if possible share this article to extend the information as much as possible.
⭐ Frequently Asked Questions
Can we grow marijuana in the winter?
In indoor cultivation without problems, but outdoors it is not worth it, as plants stop developing when temperatures drop below 15C. °In some latitudes of the planet it is possible to grow marijuana outdoors without problems in winter, especially those which are close to the equator, because in these regions a similar temperature is maintained throughout the year, but in most of the globe it is not worth trying.
Are autoflowers transplanted?
This question has been asked more than 1000 times, and the truth is that it has created some controversy, as many people recommend transplanting, but others recommend sowing autoflower seeds directly into the final pot. The problem with cars is that they have such a short vegetative growth period that you have to try to make the most of each day. With normal plants we can wait until they have created a large clod before transplanting, but with automatic ones we cannot do that or they would lose some of their growth. Personally I like to transplant all plants, plants like autoflowers we try to transplant them before their roots have colonized the entire substrate, with the consequent danger of breaking some roots during the transplant. It is done as with normal flowering plants, but with much more care, especially when removing the pot. If you are unsure about transplanting without damage, it is best to plant the seeds in the final pot.
What is the best moon for planting or transplanting marijuana?
You have to wait until there is a descending moon in a growing phase, and if it can coincide with a constellation the ofair (Gemini, Libra or Aquarius) This happens every month at least once, but if you don’t want to be aware of it you can download our App of the lunar calendar for growing marijuana, which we update every year and mark the actions corresponding to each day.