
14-01-2020 09:00:09 - Updated: 14 January, 2020
Although there are many ways to consume cannabis, the joint is the most widespread form of smoking our beloved plant. There are many different types, the standard, the “L”, the “twin turbo”, giants, with various outputs, blunts, and even gold paper. In this post we are going to focus on learning how to make a regular joint, in the quickest and most practical way. Shall we start?
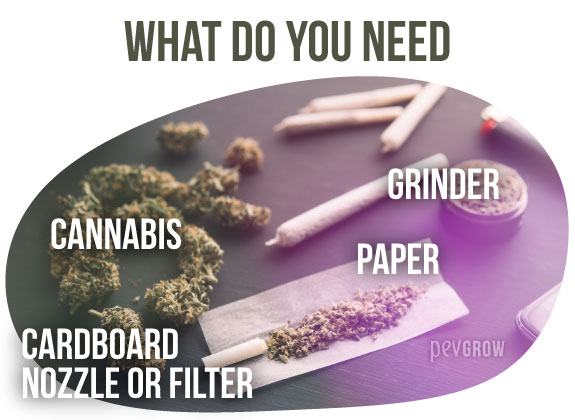
▶ What do you need to roll a regular weed join?
- A dry cannabis bud (Half a gram for plain paper and 1 gram for long paper)
- Paper Organic Raw (as thin and natural as possible)
- Cardboard nozzle or filter (If you reuse cardboard, check that it is not dyed)
- Grinder (Not strictly necessary, but it helps a lot)

🎯 Preparation of the components needed to roll a joint
1 The bud we are going to smoke has to be as clean as possible of stems and leaves before putting it in the grinder, they bring bad taste and are not healthy.

2 We take a paper from the booklet and leave it with the glue side up, to have it ready after grinding the weed.
3 If we use a cardboard nozzle, we have to prepare it before starting to roll the joint, it’s easy, you just have to form a small tube with it.
⛳ How to roll a joint step by step
1 Chop up the cannabis. Simply insert the flowers clean of stems into the grinder, close it, turn both sides, open it and evacuate the ground marijuana. If you have doubts, you can check this article that talks about how to use a grinder.
2 We take the rolling paper that we have prepared and place the crushed weed on it, making sure that the adhesive part faces upwards.
3 We spread cannabis well along the paper, leaving a clean end, at least one centimeter, to place the mouthpiece there.
4 We introduce the nozzle from the clean side, until it touches and pushes a little the weed, and we take advantage of the cylindrical form of this one to help us to give form of tube to the joint. With the help of both hands, we take the paper by holding the mouthpiece with one hand, and turn it up and down, while with the other hand we imitate the movement, giving the joint a cylindrical shape from the nozzle to the other end, by moving the paper up and down.
5 Once our joint has the desired shape we proceed to close it. To do so, while doing the up and down movement of step 4, we must press the part of the nozzle so that when you pull up the paper it’s pressed against the other side. Then, little by little, all the paper goes up, but before closing it completely, you have to moisten the glue with saliva, so that when you finish rolling it, it sticks.
6 Now the only thing left to do is to press the joint, to do this we can use a cigarette, a pencil, a key, or any other gadget with which we can squeeze the weed through the side that has been left open.
⭐ Details to keep in mind to learn how to roll a good joint
- Cannabis has to be dry and cured. When weed is wet the joint is either extinguished or not burned properly.
- Grinding of weed is better to be thin and homogeneous, otherwise the joint will be consumed faster in areas where cannabis is thinner.
- Pressing is key, if we squeeze it too much we lose a proper combustion, that is to say, as the smoke cannot circulate well inside the joint, it cannot be properly smoked and can even be extinguished. However, if you do not press it enough, it burns unevenly, so you have to press it consistently but not too hard. The secret is in practice, no one is born knowing how to do it.
– How to clean a grinder made of plastic, metal, wood and more
– What is a Grinder and how do I use it
– Autoflowering plants with more THC
– The best weed grinders in 2019
✅ Conclusion
Rolling a marijuana joint is an easy activity when you have some experience. At first it takes a little bit, it’s normal that it doesn’t go so well with the first ones, they can consumed unevenly, or even that the nozzle comes out during some puff. Don’t worry, as with other tasks, practice improves the quality of the final product. If you’ve learned something new from this article, or think it might help others, share it! I’m sure a lot of people would appreciate it.


