- Build your own homemade cannabis grow tent with our complete guide. It includes materials, detailed steps, and practical tips to optimize your indoor cultivation.
- Learn how to lower the humidity in your grow tent
- How to eliminate the smell of weed in your indoor grow


In constant struggle for the regulation of cannabis, mainly in the medicinal field.
12-06-2024 06:50:57 - Updated: 12 June, 2024
Growing cannabis indoors has become increasingly popular, and building your own grow tent is an excellent way to have total control over your cultivation environment. A homemade grow tent allows you to create ideal conditions for your plants, ensuring healthy growth and a high-quality harvest. In this article, we will explain step by step how to build a grow tent for indoor cannabis harvesting, with practical tips, details about the materials and tools needed, and tricks to optimize your grow.
📖 Why Build a Grow Tent?

Building a grow tent has several advantages:
- Environmental Control: You can control light, temperature, humidity, and ventilation, which is crucial for healthy plant growth.
- Discretion: A grow tent can conceal your grow, offering privacy and reducing odors.
- Space Optimization: A grow tent allows you to make the most of the available space in your home.
- Energy Efficiency: By having a closed and controlled space, you can maximize the efficiency of your lighting and ventilation equipment, reducing energy consumption.
- Harvest Quality: Indoor harvested weed is the best, especially if you grow it yourself.
☕ Materials and Tools Needed
Materials:
- Cabinet or Plywood: An old cabinet or plywood to build a new one.
- Reflective Plastic (Mylar) or Matte White Paint: To line the interior of the cabinet.
- Lighting System: LED, HPS, or CFL lights.
- Air Extractor and Fans: To control temperature and humidity.
- Carbon Filters: To eliminate odors.
- Timers: To automate light cycles.
- Thermohygrometer: To measure temperature and humidity.
- Flexible Ventilation Ducts: To direct airflow.
- Pots and Growing Soil: For your plants.
- pH and EC Meters: Optional but recommended to monitor nutrients.
- Aluminum Tape: To seal any possible light leaks.
Tools:
- Drill and Bits: To make holes and assemble parts.
- Jigsaw or Circular Saw: To cut wood.
- Screwdriver: To fix screws and hinges.
- Measuring Tape: To measure.
- Scissors and Cutter: To cut mylar and tapes.
- Pencil: To mark measurements.
📲 Step by Step: Building the Grow Tent
1. Cabinet Preparation
If you already have an old cabinet, this is the perfect starting point. Make sure it is clean and in good condition. If you need to build one from scratch, use plywood or MDF to create a robust structure.
Measure and Cut: Measure the available space and cut the plywood pieces according to the required dimensions. Assemble the basic structure of the cabinet using screws and hinges.
Doors and Access: Install the doors on the cabinet, making sure they close tightly to prevent light leakage. Consider adding a side access to facilitate plant maintenance. Keep in mind that you need to make holes on some side of the cabinet for ventilation tubes, cables, etc.
Sealing Light Leaks: Use aluminum tape or anti-detection tape to seal any possible light leaks at corners and joints.

2. Installation of Reflective Material
The interior of the cabinet must be highly reflective to maximize the effectiveness of the grow lights.
Reflective Plastic or Paint: Line the interior walls of the cabinet with reflective plastic (mylar) or paint the surfaces with matte white paint. This will help distribute light evenly.

Secure the Material: Use aluminum tape to secure the edges of the reflective material, making sure there are no folds or bubbles.
3. Lighting System
The type of light you choose will depend on your budget and the needs of your plants.
LED Grow Lights: They are efficient and produce less heat. Install the lights at the top of the cabinet, making sure they are adjusted to the right height with brake pulleys that allow you to raise and lower the light.
HPS or LEC Lights: These are also viable options. Make sure you have a good ventilation system to handle the additional heat.
Electric Timers: Connect the lights to timers to simulate the necessary day/night cycles for cannabis growth (18/6 for vegetation and 12/12 for flowering).


4. Ventilation and Odor Control
Good ventilation is crucial to maintaining a healthy environment for the plants.
Air Extractor and Fans: Install an air extractor at the top of the cabinet to remove hot air. Place another extractor in reverse to introduce clean and fresh air into the grow. Install a fan to stir the air inside the enclosure and prevent possible moisture pockets.
Carbon Filters: Install an anti-odor carbon filter in the extraction system to eliminate odors. Connect flexible ventilation ducts to direct airflow.


Fan Positioning: Make sure the fans are well positioned to promote efficient air circulation within the cabinet.
Air Extraction Calculation: This depends on the cubic meters of the grow. If you want to know the extraction you need, check out this article that explains how to calculate the necessary air flow in indoor cultivation.
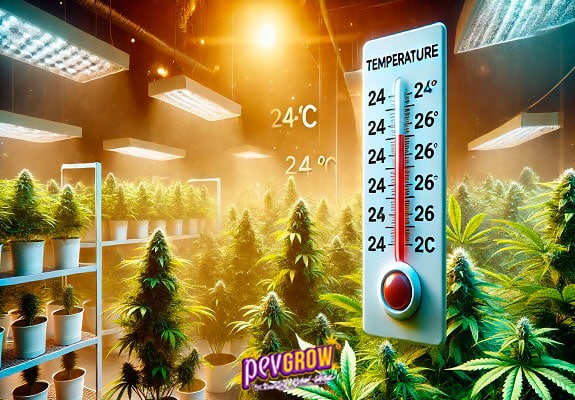
5. Temperature and Humidity Control
Maintaining the right temperature and humidity is essential for successful cultivation. For this mission, you may need the following:
Thermohygrometer: Place a thermohygrometer inside the cabinet to monitor temperature and humidity. You can also leave it outside the grow if you use a thermohygrometer with a probe if you put the probe inside. Adjust ventilation and the use of humidifiers or dehumidifiers as needed.


Climate Controllers: Consider using automatic climate controllers to maintain ideal conditions inside the cabinet.
 |
 |
| Buy Digital Thermohygrometer with Probe TH3 | Buy UCI Digital Culture Controller Temperature and Humidity |
|---|
✅ Additional Tips and Tricks
- Regular Maintenance: Check your plants and equipment regularly to ensure everything is working properly. Clean carbon filters and fans to maintain good air quality.
- Electrical Safety: Ensure all electrical connections are secure and away from water. Use surge-protected power strips.
- Constant Monitoring: Monitor the pH and nutrient levels in the water to ensure optimal plant growth. Use pH meters and EC meters for accurate readings.
- Plant Rotation: Rotate pots regularly to ensure even exposure to light and prevent plants from growing crooked.
- Plant Training: Consider training techniques such as LST (Low Stress Training) to maximize light exposure to all parts of the plant and increase yield.
- Watering and Nutrients: Water your plants regularly and provide nutrients according to growth stages. Avoid overwatering to prevent root rot. You can easily install a Drip irrigation system to facilitate this task.


🎯 Conclusion
Building your own grow tent for indoor cannabis harvesting can be a rewarding project that allows you to control all the environmental variables. By following these steps and tips, you can create an efficient and productive space for your plants, ensuring healthy and abundant harvests. At Pevgrow, we offer a wide range of high-quality products and equipment to help you build and optimize your grow tent. I don’t know what type of lighting you will choose to illuminate the grow tent you build, but you should know that LED technology is undoubtedly the best, and if you decide to try it, I advise you to read this indoor cultivation guide with LED first. Start your project today and enjoy the benefits of growing your own cannabis at home!
👾 FAQs
How much does it cost to build a homemade grow tent?
The cost can vary depending on the materials and equipment you choose. On average, building a grow tent can cost between 200 and 800 euros.
What type of light is best for a grow tent?
LED lights are a popular choice due to their energy efficiency and low heat output. However, HPS lights are also effective, especially during the flowering phase.
How to manage the smell of cannabis in a grow tent?
Use carbon filters in the ventilation system to eliminate odors. Ensure the tent is well sealed to prevent odor leakage.
What is the best temperature and humidity for a grow tent?
Maintain the temperature between 20-25°C and relative humidity between 40-60% during the vegetative phase, and reduce humidity to 40-50% during flowering.
What size grow tent do I need?
The size of the grow tent depends on how many plants you plan to grow and the available space. A common size for beginners is 1x1x2 meters, which can accommodate 4-6 small plants.


This article arrived at the perfect time! I was just in the planning phase to build my own grow closet and the detailed and practical information I found here has been incredibly helpful.